This tutorial provides a step-by-step guide on how to create MBR-based disk partitions for Antergos, using the latest edition of Cnchi, the Antergos graphical installation program, which shipped in Antergos-2014.05.26. Antergos is an Arch Linux-based desktop distribution that offers a choice of multiple desktop environments during the installation process.
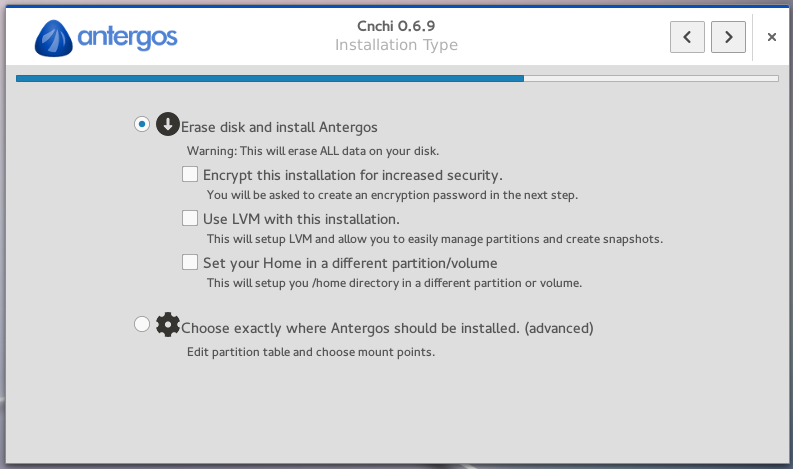
Cnchi is a relatively new graphical installer that shares many design similarities with Ubiquity, the graphical installer in Ubuntu Desktop. This screenshot shows its disk partitioning options. It has support for automated and manual disk partitioning. Full disk encryption and LVM-based disk partitioning are supported in the automated mode but not in the manual mode.
In the automated mode, the installer will, by default, create separate partitions for /boot and / (root) and, if the “Set your Home in a different partition/volume” option is checked, a separate partition for /home.

Assuming that you have downloaded the latest release of Antergos and (re)booted your computer with the installation media in the optical drive or in a USB port, and launched the graphical installer, you should, after several clicks, come to the step of the installation process shown in this screenshot. To create a custom set of partitions manually, select the “Choose exactly where Antergos should be installed. (advanced).” option, then click the forward arrow on the upper left. They should have just called that option “Manual” or “Advanced.”

This is the installer’s manual disk partitioning window. To delete a partition, select it and click Remove. To modify or edit it, click Change.

And this screenshot shows the supported file systems. ext2 is the default for the boot partition, while ext4 is the default for the root and home partitions.

This is the part where I start creating partitions. It means selecting the free space and clicking the Add button.

That should open the installer’s partition editor. Unlike in the automated mode, disk encryption and LVM are not supported when creating partitions manually. So you can only create plain, unencrypted partitions. And when doing that, the only values to modify are for Size, Use As, and Mount Point. Four partitions that will be created to showcase how to create MBR partitions in Cnchi. In order, they will be mounted at /boot, / (root), /home and Swap.

For the /boot partition, a disk space of 250 MB should be just about right. In the automated mode, 236 MB is allocated to this partition by the installer. Though the default file system for this partition is ext2, I chose to use ext4. That just goes to show that it doesn’t matter which one you choose. What matters is that the mount point be /boot. OK.

For the root partition, the minimum disk space required is 4 GB, so any amount higher than that should be enough. The mount point should be /. OK.

For the home partition, the mount point should be /home. The amount of disk space you assign to it depends on how much you have and how much you think you’ll need to run the system. OK.

For the Swap partition, select swap area from the “Use As” menu, then click OK. A disk space of 2 GB to 4 GB should be enough.

That should be all you need to install the latest version of Antergos on a set of partitions that you created manually. Be aware that at this time, it is not possible to install the boot loader in a location other than the Master Boot Record (MBR).


