“CoreOS is a new Linux distribution that has been rearchitected to provide features needed to run modern infrastructure stacks.”
That’s geek-speak for a Linux distribution that makes it (not-so-) super easy to run fun things like Linux containers and containerized applications on commodity hardware. That’s one of the trending things in the business, and it’s the kind of stuff I love to play it, even if just for the heck of it.
CoreOS just makes it easy to set up such systems, though it is not the only solution. CoreOS is derived from Chrome OS, with added functionality for server- and cluster-type installations.
To use CoreOS, you need to have VirtualBox and Vagrant installed. Other virtualization technologies are also supported, but the combination of VirtualBox and Vagrant seems, to me, to be the easiest to set up. Since I’m running Fedora 20, which has the latest version of VirtualBox in its repository, all I needed to install it, was type: <strong>yum install VirtualBox</strong>. To install Vagrant, download the RPM file from here. You can either save it to the Downloads directory and install it using yum from the command line, or open it in Apper, the graphical package manager, which will do the installation for you.
With those two installed, time to install (git clone) CoreOS itself, a task that has to be completed from the command line. So fire up a shell terminal, and also be sure to start VirtualBox. Then, type: <strong>git clone https://github.com/coreos/coreos-vagrant.git</strong>. After that, there should be a coreos-vagrant directory. Change into that directory (cd coreos-vagrant). An ls of that directory should show four files. Two of them should be named user-data.sample and config.rb.sample. Copies of tThose two will have to be modified a bit before the cluster is created.
Make a copy of user-data.sample and name it user-data (<strong>cp user-data.sample user-data</strong>). For the other file, name its copy config.rb (<strong>cp config.rb.sample config.rb</strong>). Open config.rb (<strong>nano -w config.rb</strong>) and look for the line that reads: #$num_instances=1. Uncomment it and change 1 to 3 so that it reads: $num_instances=3. That just defines the number of members in the cluster. Optionally, you may also uncomment the line that reads: #$vb_gui = false to $vb_gui = true. Making that change will just ensure that when the cluster is started, each member will have a graphical VirtualBox interface started. Not necessary, but it won’t break anything.
Then, open user-data (<strong>nano -w user-data</strong> and uncomment the #discovery: https://discovery.etcd.io/
After generating the token, replace the <strong>discovery: https://discovery.etcd.io/9b090745ad1f48344e8fd004a293067c</strong>. With all that out of the way and assuming that you’re still in the coreos-vagrant directory, bring up the cluster by typing: vagrant up. You should see messages of the sort shown in this screenshot as each member of the cluster is created.

As each member is created, you should also see a VirtualBox interface open. By default, you will not be able to do anything through them, since logging in is via SSH private keys. However, if you create a user and set a password, you will be able to log in via the VirtualBox interface, though that is really not necessary.

After creation of the cluster has been completed, you may type: <strong>vagrant ssh-config</strong> to see the SSH configuration details for each member. To log into any member, type: vagrant ssh

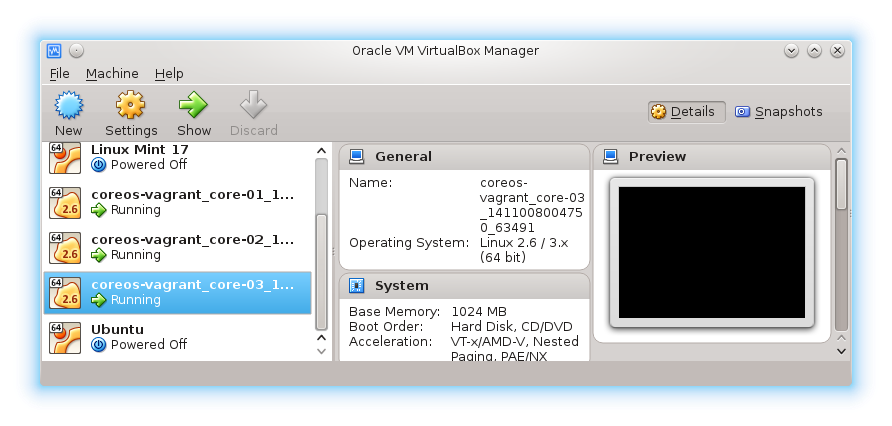
In VirtualBox, you see each member listed, just like on this screenshot.

If you have gone this far, what you have just created is really an empty cluster set, where each member is like a minimal installation of your favorite Linux distribution. So play around with your cluster, become familiar with the vagrant commands; type vagrant -h to see the list of available commands. Inside a cluster member, become familiar with the etcdctl and fleetctl management utilities. To bring down the cluster, type: vagrant halt. Next: How to transform each cluster member into a complete Linux distribution. Stay tuned.


