The 2011 editions of PCLinuxOS have started rolling off the shelves, with the KDE and LXDE editions being the first set out. (See PCLinuxOS 2011.6 KDE review for a detailed review of the KDE edition.) If you have been using PCLinuxOS, you probably know that the installer, which it inherited from Mandriva, has support for disk encryption and LVM, the Linux Logical Volume Manager.
This tutorial provides a detailed step-by-step guide on how to install this distribution on an encrypted LVM-based file system.
Why LVM and disk encryption?
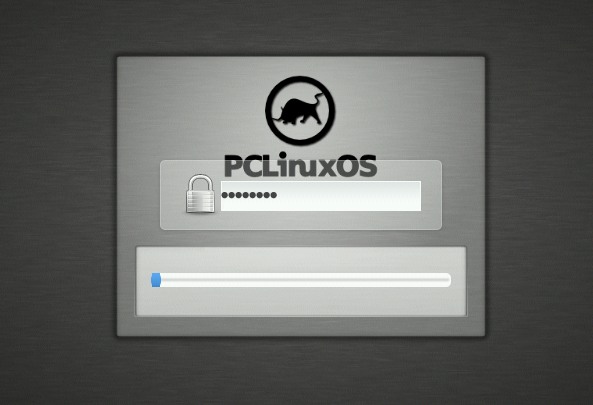
Installing a distribution or any operating system on an encrypted disk protects your data from unauthorized physical access. And that protection extends to situations where the disk is moved to another computer. Essentially, when you encrypt a disk, the encryption key or passphrase that was used to lock or encrypt the disk will be required before the system can boot completely. So, when you attempt to boot a computer with PCLinuxOS installed on an encrypted disk, you will see this early in the boot process. The system will only boot completely if a valid encryption key is specified.

LVM is a disk partitioning scheme that brings a degree of flexibility that is not possible with the traditional method. With LVM, for example, you can increase the size of a Logical Volume (LVM equivalent of a disk partition) while the file system is online. And if the disk is full, you can add a new disk to the system with the same simple steps that you used to increase the size of the Logical Volume. You may read more about the basic benefits of LVM.
To increase the size of a Logical Volume by 20 GB, for example, you need to first type this command:
<strong>lvextend -L+20G /dev/hum/home</strong>
Then to resize the underlying file system to match, assuming ext3 or ext4 is in use, just type:
<strong>resize2fs /dev/hum/home</strong>
At the time of publication (of this tutorial), there is no graphical LVM management application in PCLinuxOS’ repository, so all LVM management tasks will be from the command line.
Setting up an LVM-based system involves four steps:
- Create a non-LVM partition for /boot.
- Initialize the remaining space of use by LVM. In LVM parlance, this free space is called a Physical Volume (PV).
- Create a Volume Group (VG). A VG is a virtual container for one or more PVs. The disk space available on a VG is the sum of the disk space of each member PV. If a VG runs out of disk space, you can attached a new hard disk to the system and add it to the VG.
- Carve out Logical Volumes (LV) from the VG. As stated earlier, an LV is LVM’s equivalent of a disk partition.
Ok, enough introduction. Let us get started. Note that this tutorial used the standard KDE edition of PCLinuxOS 2011.6, but the steps involved are the same for the other editions. So, step 0 is to download an ISO image from here, burn it to a CD and boot the computer from the CD. Whether you opt to start the installation from the Live desktop or right from the boot menu, click until you get to the disk partition step shown below.
Depending on the state of the target disk, the installer will present two or more options. Because LVM is not the default disk partitioning scheme, you need to choose “Custom disk partitioning,” then click Next.

This is the main disk partitioning window. If you have more than one hard drive on the system, they will all the shown here. Select the one you wish to install the system on, then to start setting up partitions, click Create. Aside from the non-LVM boot partition, you may configure as many logical volumes that you need. However, for a desktop system, logical volumes for /, Swap, and /home are all that is required.

For the boot partition, the size should very small, that is, compared to other partitions. Most Linux distributions allocate from 250 to 500 MB to a boot partition, so any value within that range should do. For “Filesystem type,” choose Linux Native (ext2) or ext3, and for the mount point, choose /boot. Ok.

With the boot partition create, select the remaining space, then click on Create to configure the encrypted Physical Volume.

If this is the only distribution or operating system you wish to use the available disk space for, move the slider all the way to the right. From the “Filesystem type” menu, choose “Linux Logical Volume Manager.” And then enable encryption and specify the encryption key or passphrase. Ok.
Note that the installer only allows you to specify one passphrase, but you may specify as many as seven other backup encryption keys, and when configured, any of the backup encryption keys unlock the disk during startup. How to manage disk encryption passphrases and key slots provides step-by-step instructions on how to configure additional encryption keys.

After the Physical Volume has been created, the next step is to create a Volume Group. To do that, click on the bar representing the Physical Volume (the one with the key icon on it), then click Add to LVM.

Creating a Volume Group just means giving it a name. The shorter the better. Makes life a bit easier if you need to manage the system from the command line. Ok.

Yes, you want to install the lvm2 package. Without it you cannot complete the installation. Ok.


Thanks for this article. I had no idea full disk encryption with linux was so easy using PCLinuxOS or I’d have been using it for a while now… same with LVM!
I went through this step by step and it worked like a charm, thanks a lot