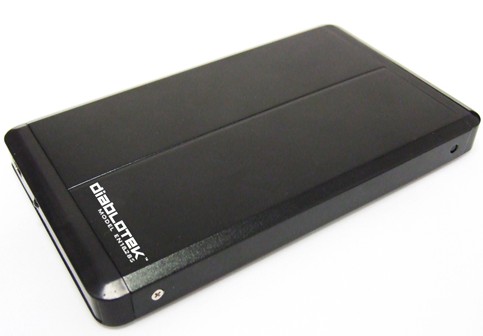
Installing Ubuntu 11.04 or any other distribution on an external hard drive connected to a computer via USB is about the same as the method used to install it on an internal hard disk. Your choice of external disk to use are many, but the one I used for this tutorial is a 2.5′ hard disk that I put in a similarly-sized hard disk enclosure.
A 320 GB 2.5′ hard disk purchased for this tutorial cost US $45. Enclosures tend to be very cheap. The one I bought cost about US $7. At 5’x2.75′, the whole unit can fit comfortably in any pocket. You can use it to clone your Ubuntu 11.04 installation that you carry along with you. And with the USB connection, you can use it on any computer that can boot off a USB device.

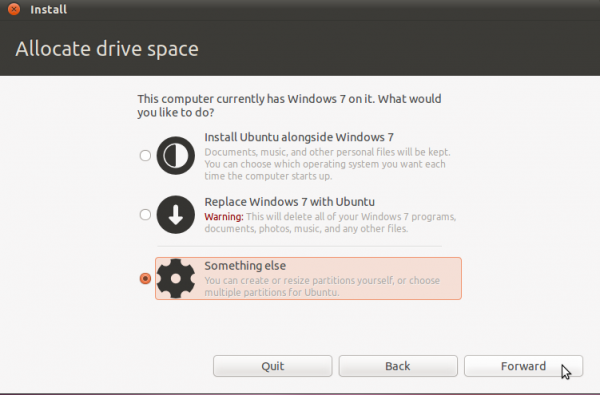
To start, connect the disk via the USB cable to any computer and boot the computer using an Ubuntu 11.04 CD or DVD. At the disk partitioning step, select “Something else.” Doing that and clicking on Forward will take you to the installer’s advanced partitioning tool, which you are going to use to configure the partitions for Ubuntu 11.04.
If the computer you are using has only one hard disk, the external drive you are attempting to use will be detected as /dev/sdb. The “b” shows that it is the second disk detected by the system. The task now is to select the disk and configure the partitions for Ubuntu.
Note: If you are intend to use this installation for serious stuff, it is better that you encrypt the disk. That entails using an Alternate Installer ISO image. You may use how to install Ubuntu 11.04 on an encrypted LVM file system as a guide, if you decide to follow that route.
You might also be interested in how to install Ubuntu 11.10 on external hard drive, with an NTFS partition at the end.
By default, Ubuntu’s installer configures two partitions – the first for /, the root directory, and the second for Swap. When creating partitions for installing any desktop Linux distribution, my recommendation is to create the following four partitions:
- /boot, the boot partition. This is where programs critical for booting the system will reside.
- /, the root directory. The bulk of the programs used for running the system will be installed here.
- Swap, unformatted disk space for use as virtual memory.
- /home, the partition where your home directory will be located. In the course of using the system, files and folders you create will reside in various folders here.
To begin configuration, select the free space as shown, and click on Add.

The first partition will be for /boot. When setting up an LVM-based system using an Alternate Installer ISO image, the default disk space allocated to /boot is 258 MB. However, only about 22 MB of that is used, so anything thing between that size range will do. For this tutorial, the default will be used. The mount point will, of course, be /boot. The default file system is ext2. OK.

The second partition will be for Swap, disk space that the computer may use as virtual memory. The suggested size for Swap is 2000 MB. Select “swap area” from the “Use as” dropdown menu. OK.

The third partition will be for /, the root directory. The default journaling file system on Ubuntu 11.04 is ext4. You may stick with it or choose another journaling file system available. The installer recommends a minimum of 4.4 GB for Ubuntu 11.04, but on a new installation, less than 3 GB of disk space allocated to / is used. Note that as you install additional application after installation, disk space used will grow, so be generous here. I think 10 GB should be more than enough. OK.

The last partition will be for /home. The file system is ext4, and you may allocate all available disk space to it. OK.

All the partitions have been configured. Before clicking Install Now, you need to change where GRUB, the boot loader, will be installed. By default, it will be installed in the MBR of the computer’s internal disk. But that is not what you want. You want to install GRUB in the MBR of the external disk. So, under the “Device for boot loader installation” section, click on the dropdown menu, and select the entry that matches the external disk that you just partitioned. Once that is done, continue with the rest of the installation.
After installation, test the system by booting the computer from the disk. You may use this as a mobile clone of your Ubuntu 11.04 installation.

You can have quality articles like this delivered automatically to your Feed Reader or Inbox by subscribing via RSS or email. This website now has a Question and Answer section. Use the commenting system for simple comments, but for more involved assistance, please use the Q & A section.




Thanks you so much! This is exactly information what I needed
thanx dude..very useful
Per your instructions, I installed Ubuntu Meerkat and Grub to my external drive (WD 160GB IDE Drive), but instead of USB, it is Firewire. However, when booting up, it goes straight to the windows MBR. I tried setting the BIOS before my Windows drive to all of the 3 available Generic Removable drives and also used my F8 to bring up the bootable drive menu and also tried booting from each of the generic removables. All went directly to the Windows MBR. I booted to the Ubuntu CD and went to the live view, where I can see the external drive and the various partitions. However, I do not know how to confirm the Grub is installed properly, or if it is possible to boot from the CD live to the external drive ubuntu? Also, not sure if my PC (home built), BIOS is to old to boot from an external drive, but wondering if there was some other way to boot the Ubuntu External, besides BIOS?? Any other suggestions would be great.
In the last image of the tutorial, did you verify that the “Device for boot loader installation” is sdb, that is, the external drive? And If the Windows drive is the only other drive in the PC, and you can still boot to it after installing Ubuntu to the external drive, then it is likely that GRUB was installed to the external drive’s MBR, else it would have overwritten Windows’ boot manager.
But you could try disconnecting the data cable from the internal drive and see if you can boot into the external. If you see a blinking cursor, then it is very likely that GRUB was not installed. If everything you try fails, then you start suspecting the Firewire connection.
I’ve never messed with Firewire, so I couldn’t really tell you much about it.
Excellent article.
This is exactly what I want to do, but I also want the bulk of the drive to be available as general storage to many OS’es.
I did the install as suggested, and assigned a last partition as NTFS, but windows refuses to see it. I re-did it and placed Ubuntu at the end of the drive, but then it refuses to boot (grub error: no such partition) which seems to be because grub is towards the end of the drive.
Finally tried
sda1 : 100mb : grub
sda2 : 600gb : ntfs
sda5 : 10gb : /
sda6 : 26gb : /home
sda7 : 4gb : swap
but Windows still refuses to see sda2 (or any partition). Any ideas?
Not sure why you are having this issue, so I decided to test a similar setup on my end. I have an external HDD with a Linux installation on it. The partition scheme is:
sda1 : 296 GB : ext4
sda4 : 4 GB : extended
sda5 : 4 GB : Swap
I connected it to a computer with Windows 7 and another Linux distro installed (dual-boot). Resized the Swap partition, and used the reclaimed space to create an ntfs partition, so the new partition scheme is:
sda1 : 296 GB : ext4
sda4 : 4 GB : extended
sda5 : 2 GB : Swap
sda6 : 2 GB : ntfs
I can see all partitions from either Windows or Linux, and I can also read and write to the ntfs partition from either OS.
I don’t think this answers your question, but I did it just to show that what you are trying to do is actually doable.
Note: The resize operation was from the Linux installation.
Here’s a new article that addresses your situation:
http://www.linuxbsdos.com/2012/02/20/install-ubuntu-11-10-on-external-hard-drive-with-an-ntfs-partition-at-the-end/
Thank you for the effort!
I’m still investigating this, but I’ve managed to achieve the desired result. My setup differs from yours in that I want to have the NTFS partition before all others.
I always assumed that placing it anywhere else confuses windows (I’m pretty sure this happened in the past). Does this concern still have any validity to your knowledge? I obviously don’t want Windows to touch the Ubuntu partitions in any way.
Anyway, the reason my first installation broke seems to be that I left the partition unformatted during installation (Ubuntu install can’t create NTFS partitions), and used Win7 to create the NTFS partition. Win7 then broke the Ubuntu setup (duh). Repeating the installation but using Ubuntu to setup the NTFS partition post install fixed everything.
If you write to the NTFS partition from Windows, are you able to see the file from Ubuntu?
Thanks so much! This is exactly what I needed
Does it matter which version of Ubuntu (32- or 64-bit)I install on an external drive? Most computers run 64-bit OS but there are still a few that only support 32-bit, mostly due to hardware. I want to be able to run Ubuntu on any computer I go to.
It doesn’t matter.
Thank you, so much! I was really stuck on partitioning my harddrive and this article really helped!
Why do we have to install grub on the external hard disk? Does this mean that we won’t be able to boot up without the external hdd?
The whole point of installing Ubuntu or any other distro on an external disk is to give you a portable system that you can take with you and run from any computer, not just the one you used to install it.
That means the external disk must be able to boot itself without relying on a boot loader installed on the host computer: Unless you want to be completely dependent on the computer to boot the external disk.
I hope this makes sense.
Thanks. My intention was to install it on an external disk since my hdd doesn’t have enough space.
hi,,
I’v trying to install ubuntu 11.10 on external HD, the instalation was succes, but it was failed to boot from that external HD.
Here is my partition: sdb1–> swap 512Mb, sdb2–> ext4 8Gb as /, sdb5–>ntfs
I think you got your partitions in the wrong order.
Try sdb1–> boot; sdb2 -> swap; sdb3–> /; sdb5–>ntfs
Or
Try sdb1–> /; sdb2 -> swap; sdb5–>ntfs
And be sure that the boot loader is installed in the MBR of sdb.
very good guide!!! works like a charm.
i have problem with my usb hardisk external. i install ubuntu 10.10.
when i use di USB HDD in other notebook the grub is error
grub rescue>..
but if i use in notebook where i install the ubuntu. the grub its working and show the menu list.
So, what happed with the grub in my usb HDD, can i give mi solution?
This may be b/c some older BIOS’es are not able to boot from grub if the boot partition is too far from the start of the drive. I’m currently trying to solve this.
Refer: https://help.ubuntu.com/community/Grub2#error:_no_such_partition
Thanks for the guide. It really was useful.
Worth pointing out that some external hard drives have their own agenda when it comes to using them as a boot drive. Some of them have their own sequence you need to do with the buttons before it’ll let you boot.
Good point. And I think that is why some are having problems booting after installation. The same goes for USB Flash drives.
Dear Chris,
Can you please explain and help as to how to go about making my WD 500GB Ext HDD bootable? I have already installed Ubuntu 11.10 as per the instructions above and the installation went on well. However, after booting, and try to choose from BIOS, the option for USB Hard disk, this option is not available for this WD500GB ext HDD. Appreciate your help, please. Thanks.
Can you see the WD HDD in the BIOS as an available disk? I’m not talking about the BIOS boot menu, but from the advanced settings of the BIOS. I’m guessing it is there, else you would not have been able to install Ubuntu on it.
Boot the computer from the internal disk, then connect the WD to see if it will open. Usually it will. Then disconnect the internal disk, reboot the computer to see if the PC will boot from the WD HDD. If it does not, then there is something wrong with the WD.
Hi, you have to insert the drive in and then when u re boot and go to boot options the new hdd will be seen under +
Now u have to move the hdd by either pressing f6
And then press f10 and save and u r done it works perfect
Hi, you have to insert the drive in and then when u re boot and go to boot options the new hdd will be seen under +
Now u have to move the hdd by either pressing f6
And then press f10 and save and u r done it works perfect
Followed instructions and installed Ubuntu 11.10 including GRUB on a WD USB3.0 500GB external Hard Drive. So far so good. However, once I tried to boot it, this External HDD was not recognized as a USB. However, when I insert a bootable USB flash of 8GB with Ubuntu 11.10, it shows the flash and boots from it. What could be the problem when I try to boot from WD 500GB ext Hard Drive in not recognizing it as a USB drive?
same problem with an external 60Go HDD…. i followed the instructions, all seems to install well but no choice to boot from extHDD at reboot. the boot sequence is fine (i have macosx installed on another ext HDD and when i connect it, it boots). any idea?? its not recognized
for some reason i don’t know, it did not work with the 60Go HDD so i tried with another external 100Go HDD, & it worked like a charm, thx for the tutorial.
Hello is it also possible to install it on my external hdd and install grub on the eternal hdd so i can use ubuntu as my own personal instal? for when i am at school / customers so i have all the tools with me?
Yes, that’s what the tutorial shows. Just be sure that you specify that the installer puts GRUB in the MBR of the external drive; by default, it will want to put it in the MBR of the internal drive.
hello…i have a doubt..why must we specify the /boot and /home partition? why don’t we just create swap area n then directly create the partition for / only? is there any differences?