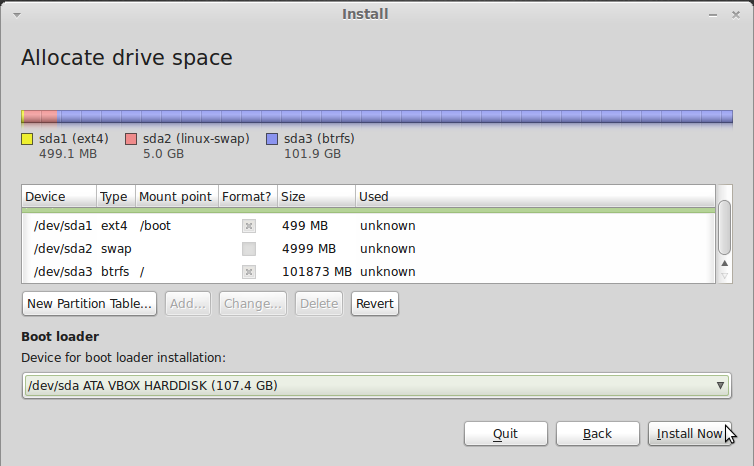
Two partitions down, one left. Select the remaining free space and click on Add.
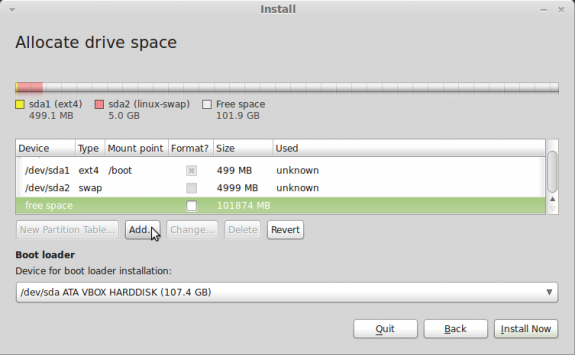
Select free space
The last partition to create will be used for the root file system, and will mounted as a btrfs file system. Keep in mind that the system default is ext4, so you will have to select btrfs from the dropdown menu. The installer will also try to create this as a logical partition, but I have opted to use it as a primary partition. The mount point is, of course, /. Because only three primary partitions are created here, you are still left with one primary partitions. That is why I chose to create all three partitions as primary.
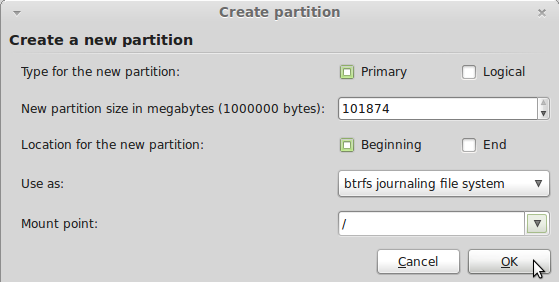
Create root partition
With all partitions created, click on the Install Now button to continue with the rest of the installation. That is the end.
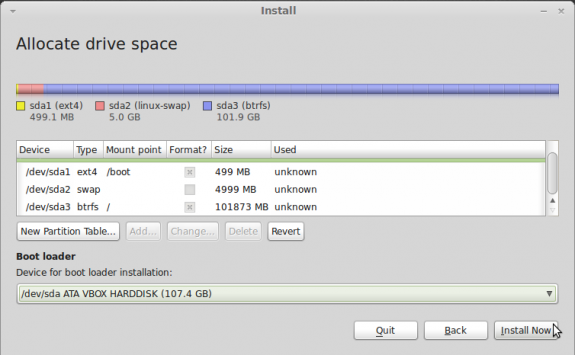
Partitioning completed. Continue installation
Resources: Find more tutorials on Linux Mint here, and learn more about btrfs by visiting the projects home page. Download Linux Mint 10 here.

