Introduction
CloudBerry Backup, is a cloud backup software with support for 256-bit AES encryption, image-based backup and data deduplication. The Pro and Ultimate versions are available with a 15-day trial, but the Freeware edition is completely free to use, though it lacks support for encryption and compression, two features available in the Pro and Ultimate editions.
A couple of article I’ve written about CloudBerry Backup showed how to use it to backup Linux files to a Minio storage server and to a Wasabi storage server. In this article, you’ll learn how to use CloudBerry software for Linux cloud backup to back up your files on a Linux desktop to an Amazon S3 bucket. A Kubuntu 17.10 desktop was used as the test system for this article, but the instructions should work for a recent Linux desktop based on Debian or Ubuntu.
Amazon S3 is a scalable cloud storage component of Amazon Web Services (AWS) platform, so you’ll need an Amazon AWS account to complete this tutorial. Therefore, to follow along with this tutorial, sign up for a free tier account by visiting the previous link. And be sure to set up an AWS Identity and Access Management (IAM) user, generate the access and secret keys for the user and create the bucket that you’ll like to use to backup your files. You’ll need the access and secret keys of the IAM user further down in this article, so make a note of them.
Aside from an Amazon AWS account, you’ll need CloudBerry Backup installed on your Linux desktop to complete this tutorial. How to accomplish that is the subject of the next section.
Installing CloudBerry Backup
The instructions and commands in this section show how to install CloudBerry Backup on Kubuntu 17.10, but because that distribution is based on Ubuntu, you can also use the commands to install it on that distribution or any distribution derived from it. The first task in the installation process involves downloading the .deb file from here. Click on the DOWNLOAD FREE TRIAL button on that page and save the downloaded file under a name like CloudBerryBackup_v2.2.deb. Then navigate to the directory where the file was saved into and type the following command to install it: sudo dpkg -i CloudBerryBackup_v2.2.deb.
If installation completes without an error, an entry named CloudBerry Backup should appear in the Internet applications menu category. There should also be a command line interface named cbbCommandLine installed into the /opt/local/CloudBerry Backup directory. How to use the graphical interface of CloudBerry Backup on Kubuntu 17.10 is the subject of the next section.
Using CloudBerry Backup
To start using the graphical user interface of CloudBerry Backup on Kubuntu 17.10, click on its entry in the Internet applications menu category. The following images show a step-by-step process of how to use it for the very first time on that Linux desktop.
When the application starts, select the option highlighted in this image and click Next.
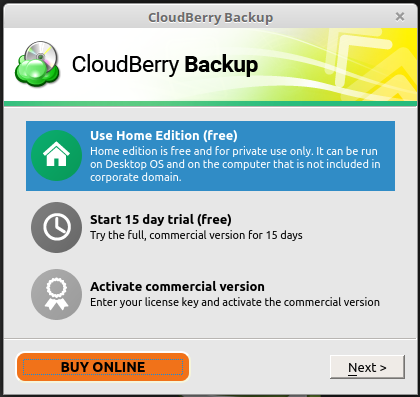
Figure 1: Starting CloudBerry Backup graphical interface
In the image shown below, type in a username and a valid email address, then click Get registration key. One should be sent to the provided email address, so check your email and copy the key into the text box. Click Finish.
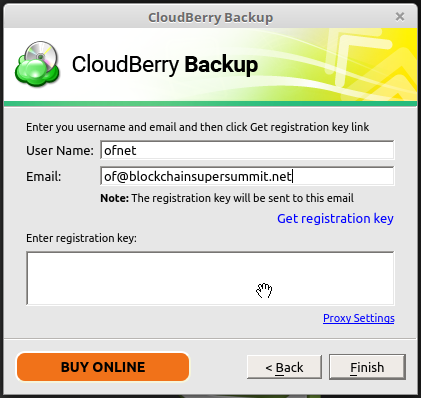
Figure 2: Configuring CloudBerry Backup user account
You should be presented with the image below. Now the Freeware edition of CloudBerry Backup for Linux is ready for use. To set it up to use your Amazon S3 IAM account, click on the Back up Files button.
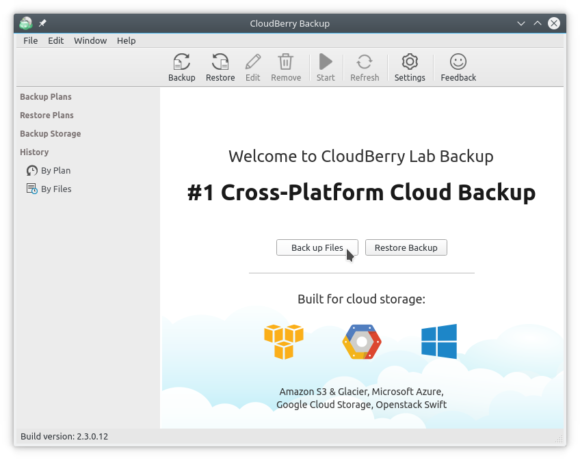
Figure 3: Main interface of CloudBerry Backup graphical interface
Clicking the + button in the next window should show the supported cloud storage platforms. To back up your files to an Amazon S3 bucket, select the Amazon S3 & Glacier option from the list, then click Continue.
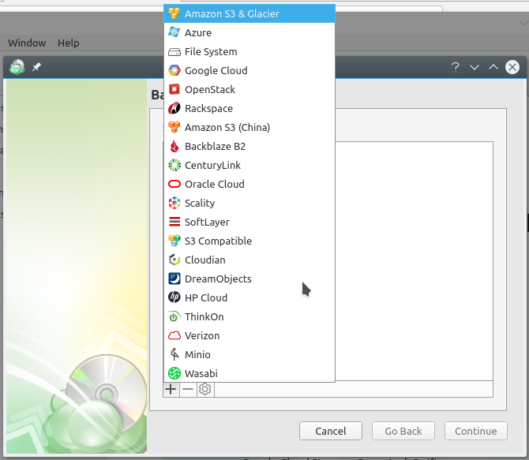
Figure 4: List of cloud platforms supported by CloudBerry Backup
In the window that opens after that, copy and paste your AWS IAM user’s access and secret keys. The Display Name is any name that you like, however, the Access Key and Secret Key must be the same as those of your IAM user. If the connection to AWS account is successful, the buckets configured under the account should show up in the Bucket menu, so you can select which one to use for backups. If the connection to your Amazon S3 account is not over SSL, clicking on the Advanced settings button…
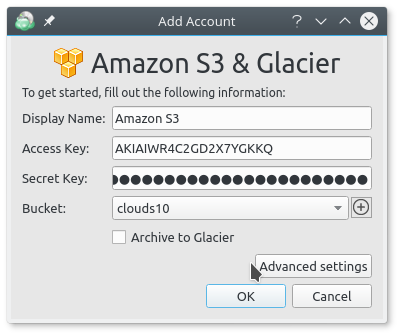
Figure 5: Configuring CloudBerry Backup for Linux for use with Amazon S3
Will open a window that gives you the option to enable or disable it. It is enabled out of the box.

Figure 6: SSL option on CloudBerry Backup
With the Amazon S3 account configured, you should be back at the window shown in this next image. The next series of tasks involve configuring the backup settings and policies, so click on the Continue button.
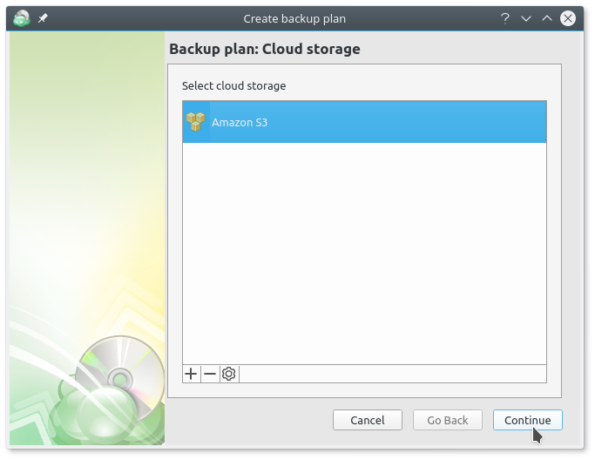
Figure 7: Amazon S3 plan for use with CloudBerry Backup
The first task in configuring your backup plan’s settings and policies is to give it a name. Continue.
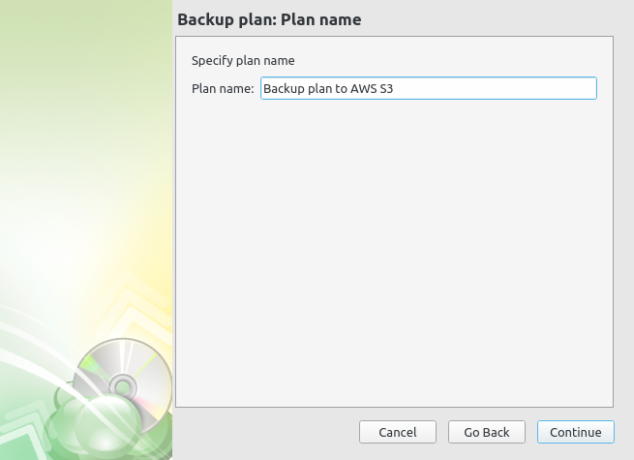
Figure 8: Configure Amazon S3 plan for use with CloudBerry Backup
Next task is to select the files and/or folders you wish to backup from the window shown in this next image. Note that only a few windows have been selected from this set of tasks to show what you need to configure. Continue.
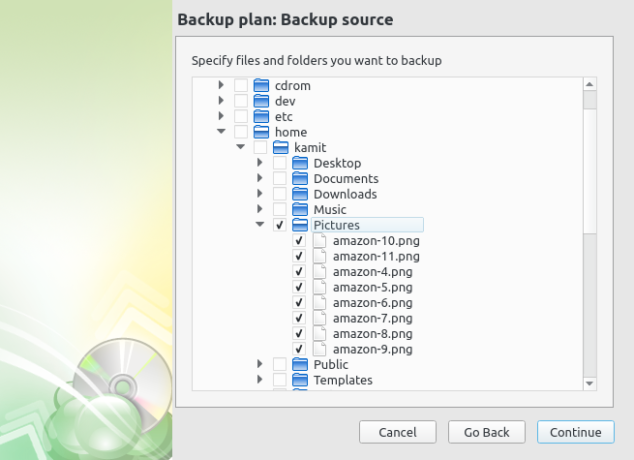
Figure 9: Selecting files to backup using CloudBerry Backup
Compression and encryption are not supported in the Freeware edition, so you may just click Continue when presented with the window shown in the next image.
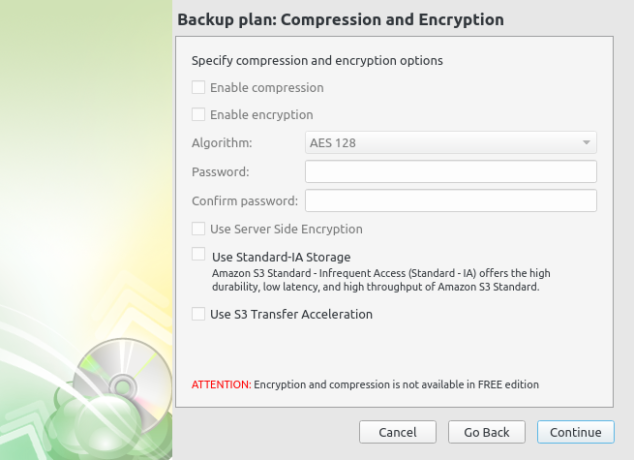
Figure 10: Compression and encryption options on CloudBerry Backup
You can configure the backup retention policy. Continue.
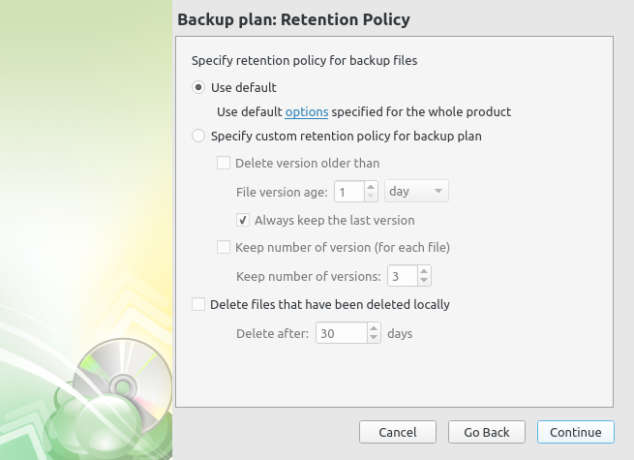
Figure 11: Configuring backup retention policy options on CloudBerry Backup
And also a backup schedule and when it should be triggered. Continue.
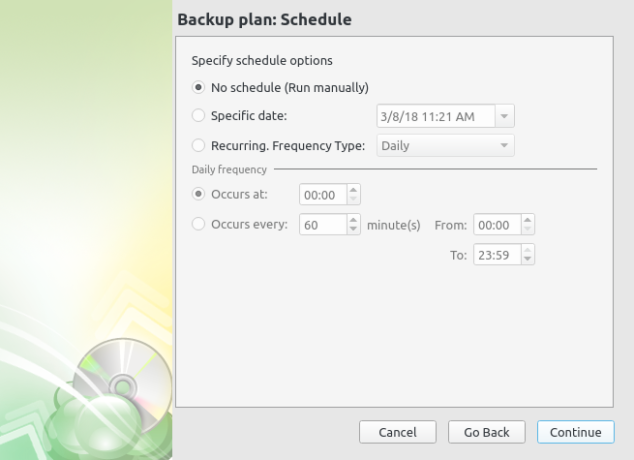
Figure 12: Backup plan schedule on CloudBerry Backup
When all the settings and policies of the backup are all in pace, and a backup has been triggered, you should see the status of the operation in the following window. However, if the number/size of the files to be backed up is small, the operation would have been completed before you get to this window.
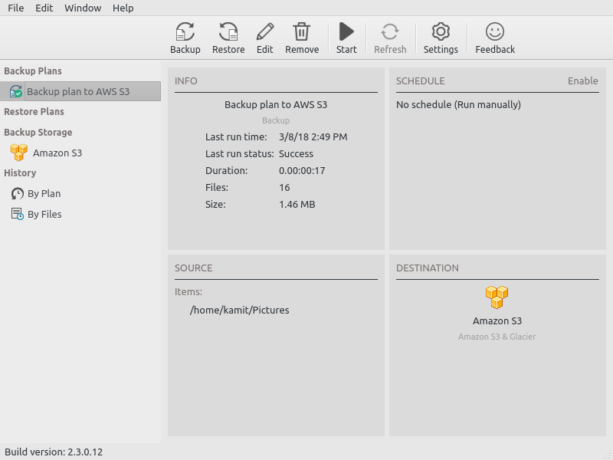
Figure 13: CloudBerry Backup in action
After the backup has finished, the files should appear in the target bucket of your Amazon S3 account’s dashboard.
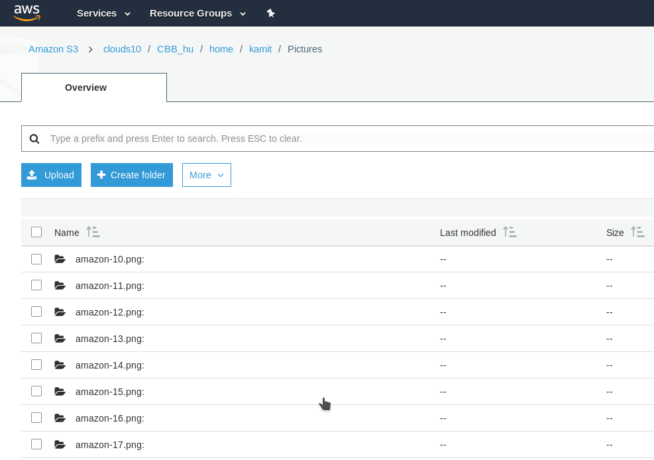
Figure 14: Amazon S3 account dashboard
So that’s how you use the graphical user interface of CloudBerry Backup on Kubuntu 17.10 to archive your files to an account on the Amazon S3 storage platform. In the next section, you’ll learn how to restore the files using the same application.
Restoring Files from an Amazon S3 backup using CloudBerry Backup
A backup plan without a corresponding restore plan makes for an incomplete disaster recovery scheme. So the steps in this section of the tutorial are just as important as the prior ones.
Start by clicking on the Restore Backup button on the main window, then select the cloud storage platform you backed up your files into in the following window. Click Continue.
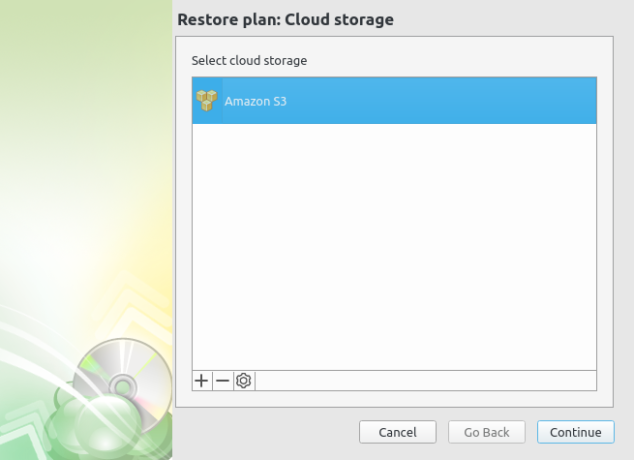
Figure 15: CloudBerry Backup restore interface
Select the plan’s name or how you intend to implement the restore operation. Continue.
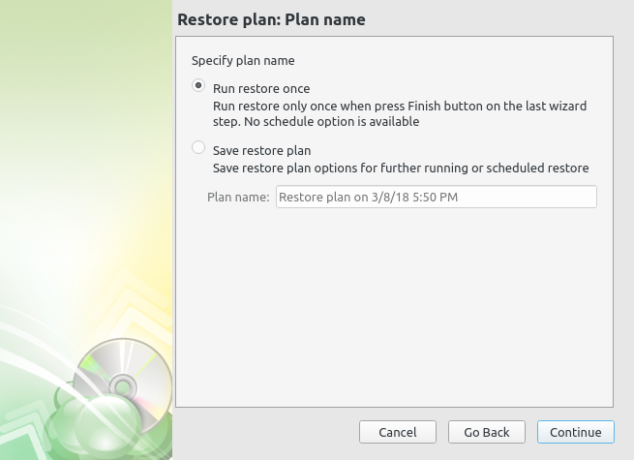
Figure 16: CloudBerry Backup restore plan
Specify the version of the backup you wish to restore? There are options specific to Amazon’s S3 service here that you might want to enable also. Continue.
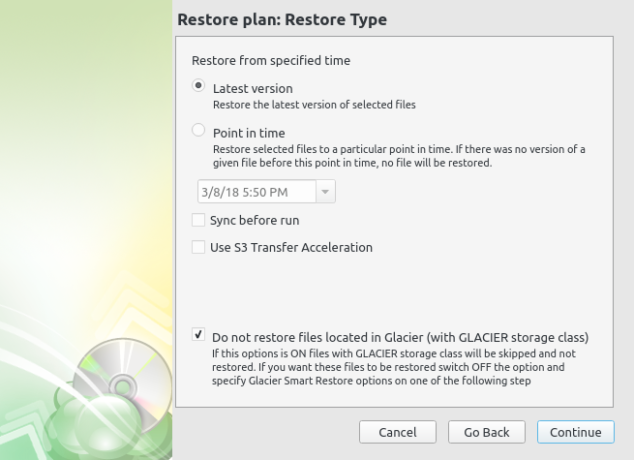
Figure 17: CloudBerry Backup restore type
You may restore all the files or just some of them. Make the selection in the next window. Continue.

Figure 18: Selecting files to restore using CloudBerry Backup
Indicate where you wish to restore the files into. Same location as the original or some other location. When setting up a restore operation, it’s best to restore to another location, so as not to overwrite the original files. Continue.
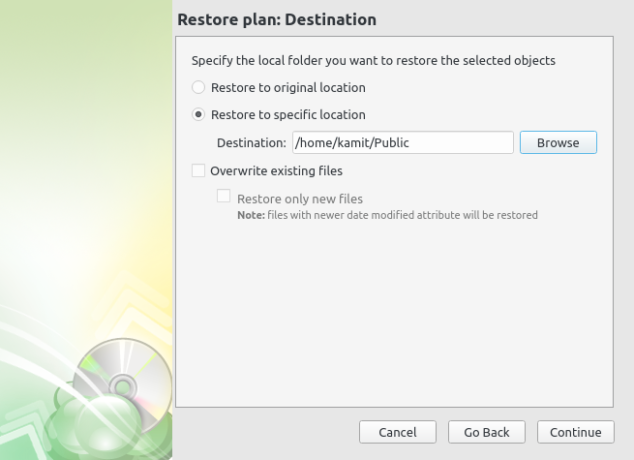
Figure 19: Selecting restore destination on CloudBerry Backup
Since the Freeware edition does not support encryption, that option is disabled in this window, so just click Continue here.
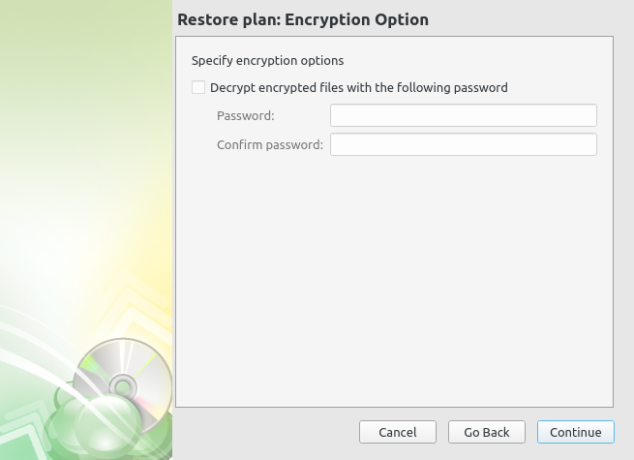
Figure 20: Specifying decryption passphrase for restore operation with CloudBerry Backup
You may set up the plan to send email notifications. Continue.
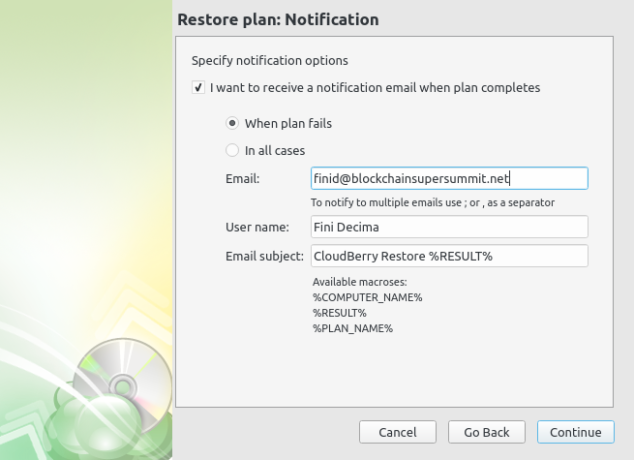
Figure 21: Configure notification settings for CloudBerry Backup restore operations
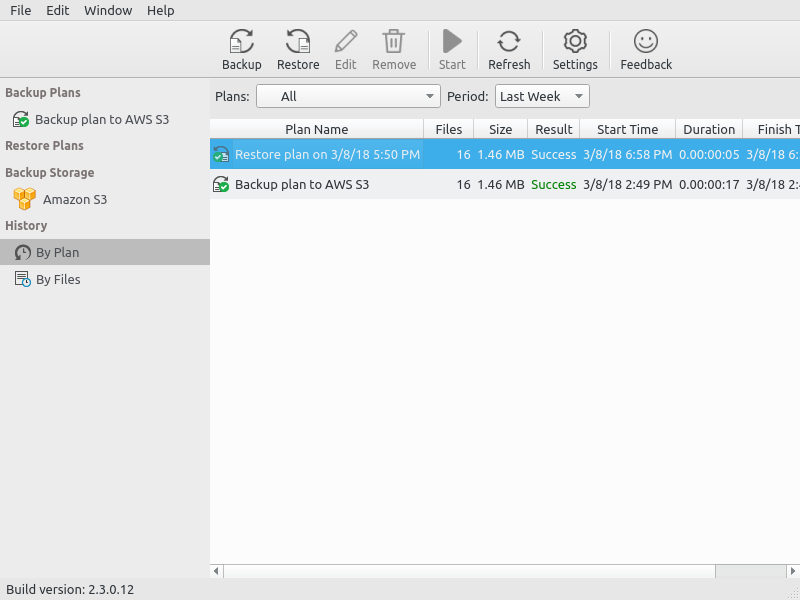
After the restore plan has been set up and triggered, you may then check the status of the operation from the History section. Success means you may now schedule a backup to run at specific times. An error message means you need to troubleshoot the operation and try again.

Figure 22: Status of CloudBerry Backup restore operations
Conclusion
in this article you’ve learned how to install and use CloudBerry software for Linux backup on Kubuntu 17.10 to backup your files to your account on the Amazon S3 platform. You’ve also learned how to use it to restore the files from a backup.
If you need advanced features of CloudBerry Backup for Linux not available in the Freeware edition, you should consider taking the Pro and Ultimate editions out for a spin, as they come with support for compression and encryption. And a 15-day trial of both editions means you can use them within that time frame without making a financial commitment.


Another very strong and powerful post. I’ve been reading through some of your previous posts and finally decided to drop a comment on this one. I signed up for your newsletter, so please keep up the informative posts!
Office 365 Migration Support