![]()

But being simple does not mean that the default partitioning scheme, which creates only two partitions, will satisfy the requirements of the system you wish to create. That’s when a fundamental knowledge of disk partitioning on a Linux system comes in handy, and that’s why, for those without that knowledge, this guide has been written.
The two partitions created by the Mint/Ubuntu installer are: /dev/sda1 for the root file system directory and /dev/sda5, a logical partition for swap. I assume that you are reading this because you want to create separate partitions for the home file system directory (/home), or for /usr, /var, /tmp, etc.
So get your installation disk ready, insert it into your computers optical drive, reboot, and let’s get started. For a generalized guide to dual-booting, see guide to dual-booting.
On Ubuntu, the installer will give you the option to boot into a live CD environment or to bypass the live CD environment and begin installation. On Linux Mint, installation can only be initiated from the live CD environment.
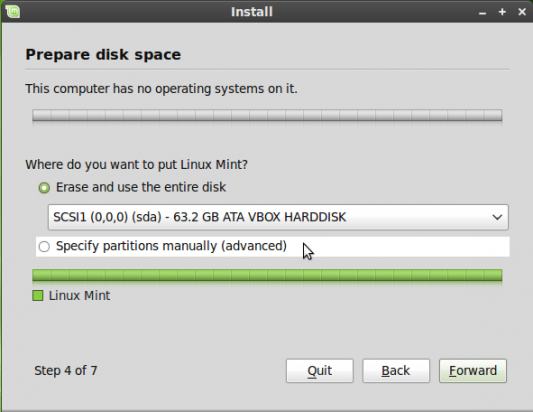
Whether on Mint or Ubuntu, the image below is from the fourth step of the installation process. The first three steps requires nothing more than clicking the “Forward” button, and have been excluded in order to reduce the number of images used in this tutorial. Looking at the image below, you’ll notice that the disk used for the tutorial does not have an operating system on it. The default option is, therefore, to “Erase and use the entire disk.” If the hard drive on your computer is not empty, the installer will inform you that “This computer has [operating system XYZ] on it,” and the default option will be to “Install them side by side, choosing between them at startup.” Whatever the case, you do not want the default. You want to select the “Specify partitions manually (Advanced)” option. So make the selection and click the “Forward” button.
Preparing partitions
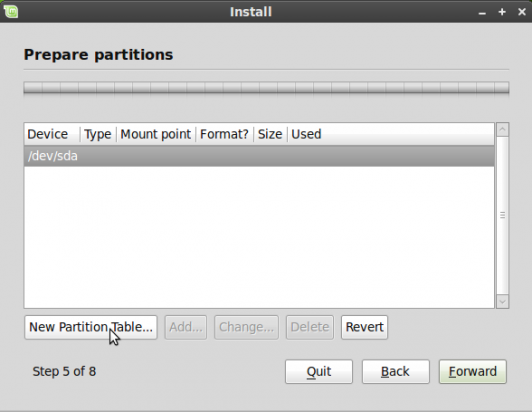
This image just shows how the window will look with “Specify partitions manually (Advanced)” selected. Forward.

Manual partitioning
If the hard drive on which you are going to install onto does not have a partition table, click on the “New Partition Table…” to create one. Otherwise, skip to the next image.
Create new partition table
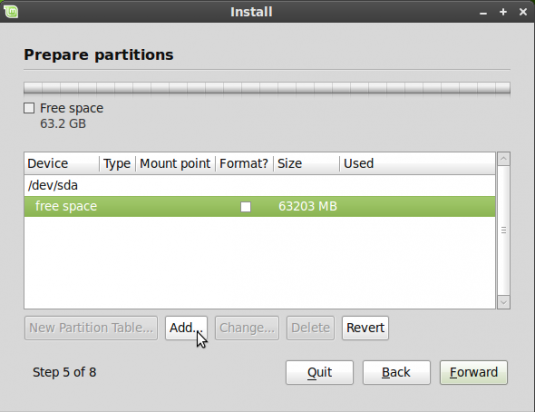
Now we can start creating partitions. For this guide, we’ll be creating partitions for the following:
- /boot
- swap
- /, the main file system directory
- /home
That’s should be all that’s needed for your laptop or home computer. Select the free space as shown and click the “Add…” button.
Creating new partitions
The first partition will be for /boot. A size of 100 MB is more than enough for it. That, by the way, is just about the size that virtually all distributions allocate to it. For the file system, that is, for “Use as,” select “Ext4 journaling file system,” then /boot for “Mount point.” Click “OK.”
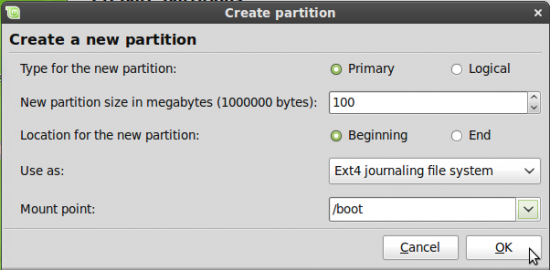
Creating the boot partition


