 Openfiler is one of two free and open source NAS/SAN applications in active development (the other one is FreeNAS). By default, Openfiler is installed to hard disk using the traditional Linux disk partitioning system. Linux Logical Volume Manager (LVM) adds a layer of flexibility to disk space configuration and management that is not possible with the traditional method of disk partitioning. Fedora, Debian and Mandriva have installers with automatic LVM partitioning features. With Openfiler, however, your only option is by manual configuration. This tutorial offers a step-by-step guide to installing Openfiler on disk using LVM.
By default, Openfiler creates the following partitions – the sizes are in parenthesis:
- /boot (101 MB)
- swap (1020 MB)
- / (the rest of the disk space is allocated to the /, the main system partition)
Once installed, a default installation of Openfiler takes up just about 630 MB and 8.4 MB of the available space on the root and boot partitions respectively. That is less than 1.0 GB for a default installation. Knowing this, we can now tailor our LVM configuration to use just the disk space needed to get the system up and running.
Note that this is not a complete installation guide for Openfiler. We are only dealing with the disk partitioning aspect of the installation process. As such, this tutorial starts at the point in the installation process where disk partitioning begins.
By default the installer will automatically partition the disk. We want to select “Manual partition with Disk Druid.” Select and click “Next.”
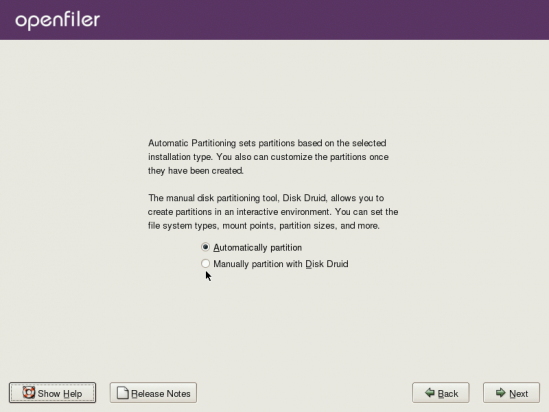
By default the installer will automatically partition the disk. We want to select manual partitioning.
With manual partitioning selected, click “Next.”
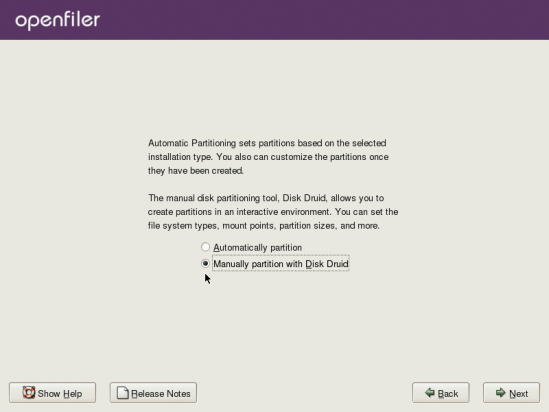
Manual partitioning selected.
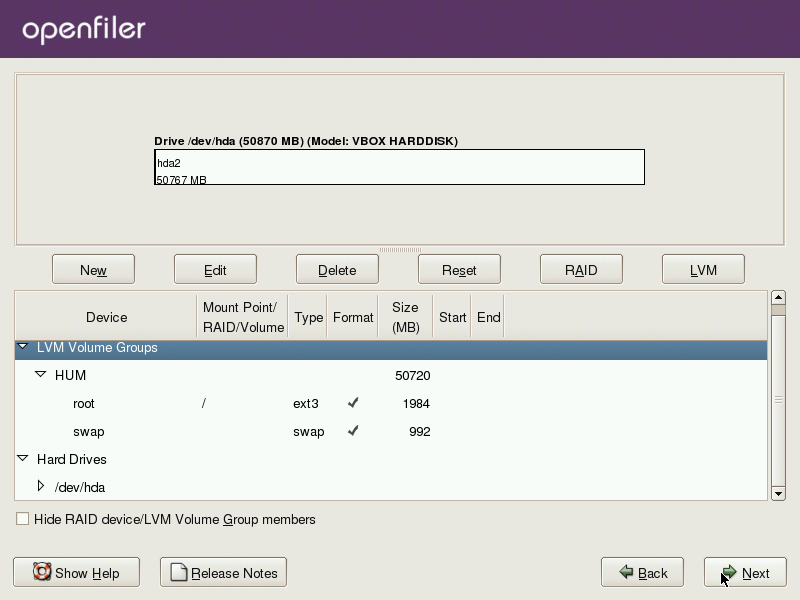
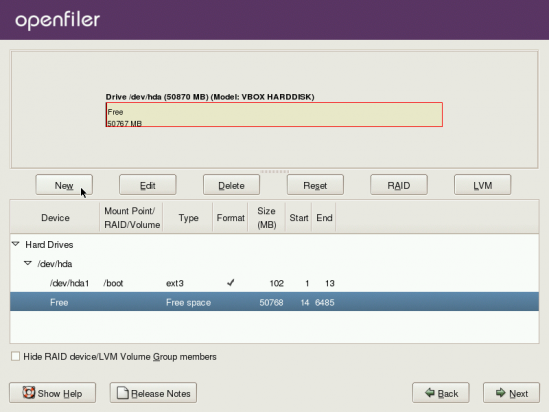
This is where the fun starts. For this tutorial, our test machine has a disk drive of about 50 GB. The first step is to create a non-LVM partition for the boot partition. Select the drive and click the “New” button.

This screen shows the main disk partitioning window. All the disk available for installation will be visible on this screen.
We only need to allocate about 100 MB. Recall that by default, Openfiler allocates 101 MB. Make the selections as shown in the screenshot below and click “Ok.”
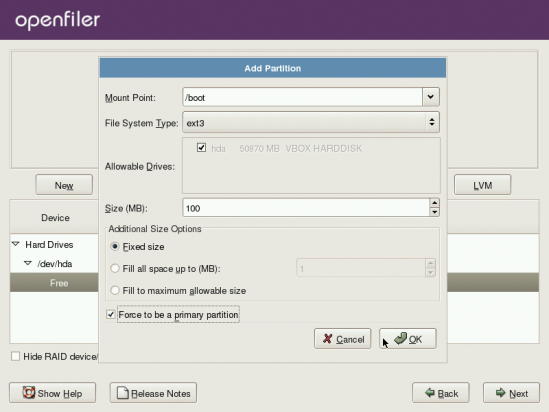
Creating the boot partition.
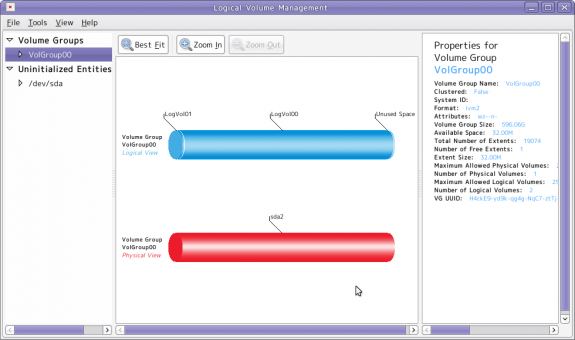
With the /boot created, the next steps are all concerned with LVM configuration. The first step of that is to create a Physical Volume (PV), that is, to initialize the rest of the disk space for use by LVM. Next is to create a Volume Group (VG) and assign the PV to the VG. Finally, Logical Volumes (LVs) are created. LVs are LVM equivalents of disk partitions. Select the free space on the disk and click “New.”
The boot partition has been created. Now is the time to create the physical volume.
To create the PV, select “physical volume (LVM)” for File System Type, and click on the radio button next to Fill to maximum allowable size. “Ok.”
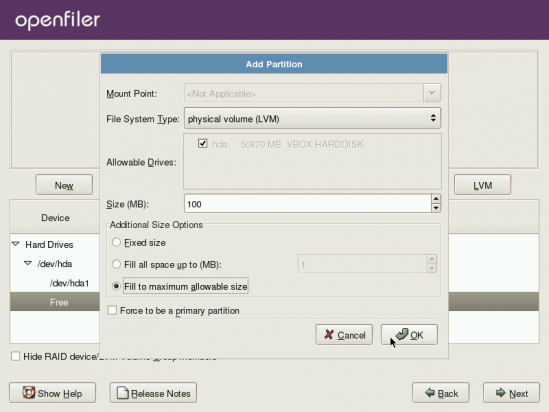
Creating the Physical Volume
With the PV created, the next step is to create a VG. Click on the “LVM” button.

First step towards creating a Volume Group
All you need to do to create a VG here is to give it a name. You may leave the default name or choose one that suits you. Now that that is done, click on the “Add” button to start creating the LVs.
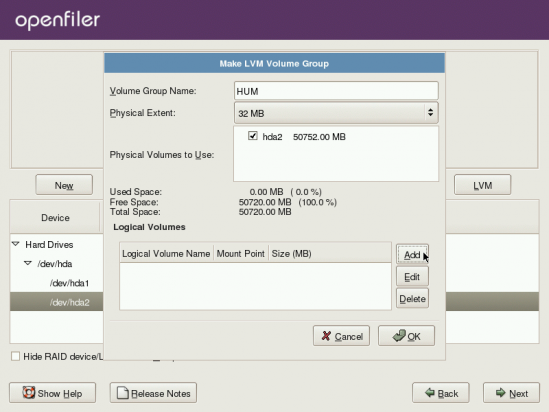
This steps involves creating the VG and assiging the PV to the VG


My apologies..there are 2 – 1.5Tb drives in each of the 8 servers. We are only worrying about one server right now just to get the thing up and running. After setting up the kernal and the swap partition I was able to get the remaining space on the primary drive into a volume group but was unable to get the space (the whole 1.5Tb) on the secondary drive to merge so that under the Volumes tab it would show that there was almost 3Tb available as storage.
Finid…I am a student working on school project in the school lab. Trying to turn 8 servers into one huge SAN. I am referencing your instructions along with the directions from the OF website. Since each of these servers have 2-3Tb drives (no RAID), do I need to name each of the LVM’s with the same name or can they be different to reflect the individual drive?
Need some clarification: Are you saying that each server has 1 drive of about 2-3 Tb or multiple, 1 Tb drives? Keep in mind that you do not name LVM, but volume groups and logical volumes. So clarify the first point for me and then I can attempt to answer your question.
It would be nice to mention what version you are using because I downloaded OF on April 20 because i saw no windows to make the LVM group like that shown in your pictures. I had to do it through the web GUI.
According to the title, it’s version 2.3. Btw, this is about installing Openfiler using an LVM-based partitioning scheme. If you are doing it through the admin interface, then you are not touching the disk or disk partitions on which Openfiler is installed.